
![Getting Started with Photography Fundamentals [Beginner Guide]](https://images.rapidload-cdn.io/spai/ret_blank,q_lossless,to_avif/https://kellytareskiphotography.com/wp-content/uploads/emplibot/photography-education-basics-hero-1770837022-1024x585.jpeg "photography-education-basics-hero-1770837022")
Getting Started with Photography Fundamentals [Beginner Guide]
Key Takeaways
- Understanding the exposure triangle—aperture, shutter speed, and ISO is a basic of Photography education.
- Manual mode empowers you to learn by forcing you to control camera settings, enhancing your skills.
- Master composition techniques like the Rule of Thirds and framing to elevate your photography beyond simple snapshots.
- Invest in essential gear like a tripod and keep your lens clean to produce high-quality images without expensive equipment.
- Practice regularly, seek feedback online, and focus on mastering fundamental skills before considering upgrades.
Photography education basics doesn’t have to feel overwhelming. We at Kelly Tareski Photography know that starting your photography journey is easier when you understand the core concepts first.
This guide walks you through camera settings, composition techniques, and the gear you actually need. By the end, you’ll have a solid foundation to build your skills.
Understanding Camera Settings and How They Work Together
The Exposure Triangle Controls Your Images
Three settings-aperture, shutter speed, and ISO-form the exposure triangle, and they work together to determine how your photos look. Aperture controls how wide your lens opens, measured in f-numbers like f/2.8 or f/16. A lower f-number means a wider opening that lets in more light and creates a shallow depth of field, which is why portrait photographers favor f/2.0 to f/4.0 for that blurred background effect. A higher f-number like f/16 closes the lens down, reducing light but keeping more of your scene sharp from front to back-essential for landscapes where you want everything in focus.
Shutter speed determines how long light hits your sensor, measured in fractions of a second or full seconds. Fast speeds like 1/500 second freeze motion, making them ideal for sports or wildlife, while slow speeds like 2 seconds or longer create motion blur in waterfalls or light trails. ISO is your sensor’s sensitivity to light, ranging from 100 to 3200 or higher on modern cameras. Lower ISO values like 100 produce clean images with minimal grain, but in dim conditions you need higher ISO like 1600 or 3200, which introduces digital noise that post-processing can partially reduce. The trade-off is constant: if you increase shutter speed to freeze action, you let in less light, so you must either open your aperture wider or raise ISO to compensate.
Manual Mode Teaches You Real Control
Automatic mode prevents you from learning. When you shoot in Auto, your camera makes all the decisions about aperture, shutter speed, and ISO, leaving you as a passenger. Manual mode forces you to think about what you’re doing and why, which is exactly how you build skill.
Start by setting ISO based on your lighting conditions: 100 to 400 for bright daylight, 400 to 800 for cloudy days or indoor light, and 1600 or higher for low-light situations. Then choose your shutter speed based on whether you want to freeze or blur motion. For handheld shooting without a tripod, stay above 1/60 second to avoid camera shake, though longer lenses require faster speeds-try for at least 1/100 second with an 85mm lens. Finally, adjust your aperture to achieve proper exposure and the depth of field you want.
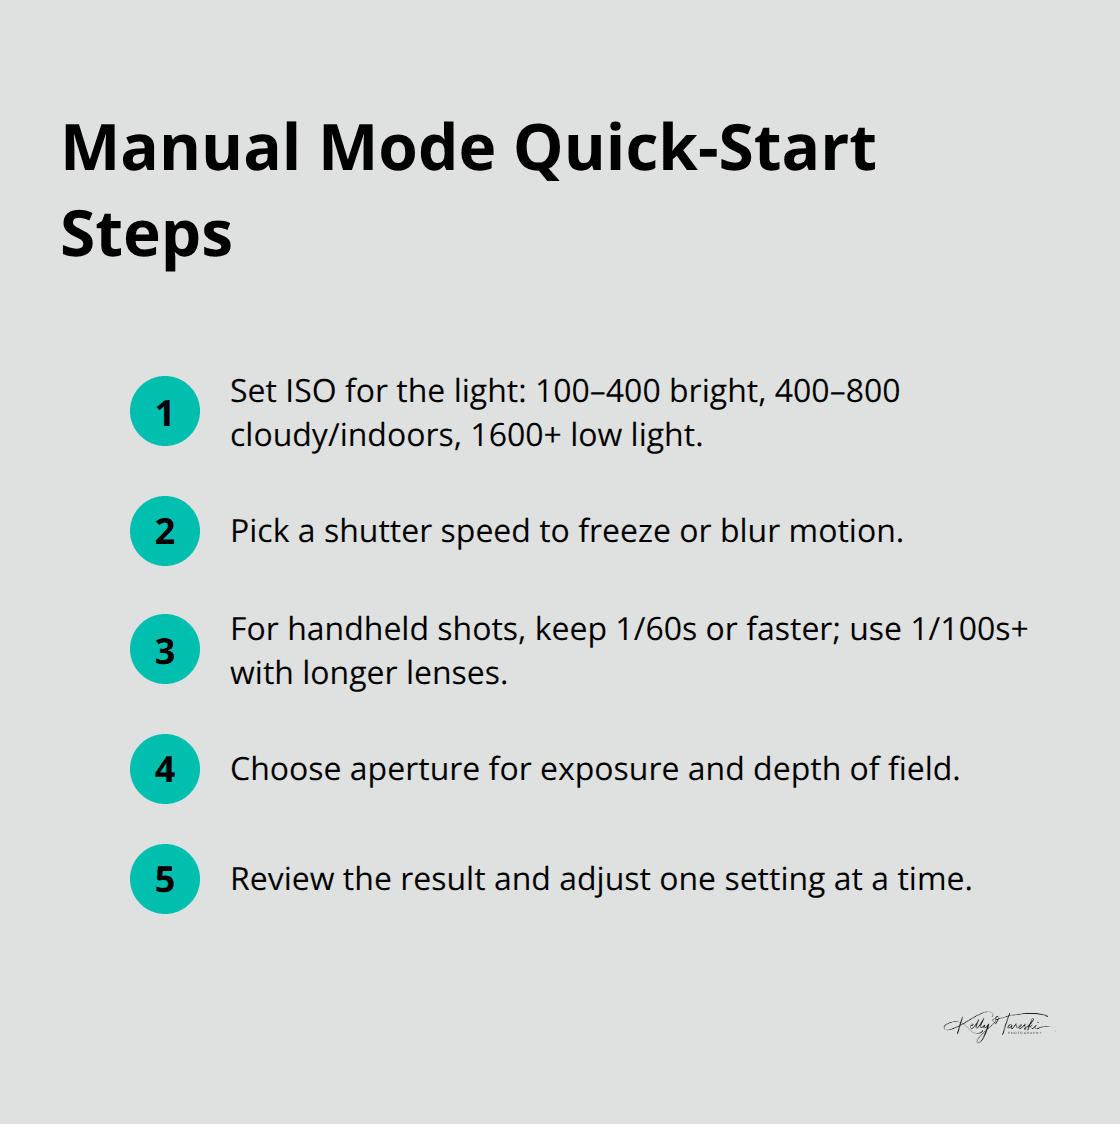
This three-step process becomes second nature after a few shooting sessions, and you’ll stop guessing about why your images are too dark or blurry.
Aperture Priority mode offers a useful middle ground where you set the aperture and ISO while the camera picks the shutter speed, giving you creative control without total manual management. Shutter Priority works similarly but lets you control motion blur while the camera adjusts aperture.
Your First Camera Needs Manual Control, Not High Price
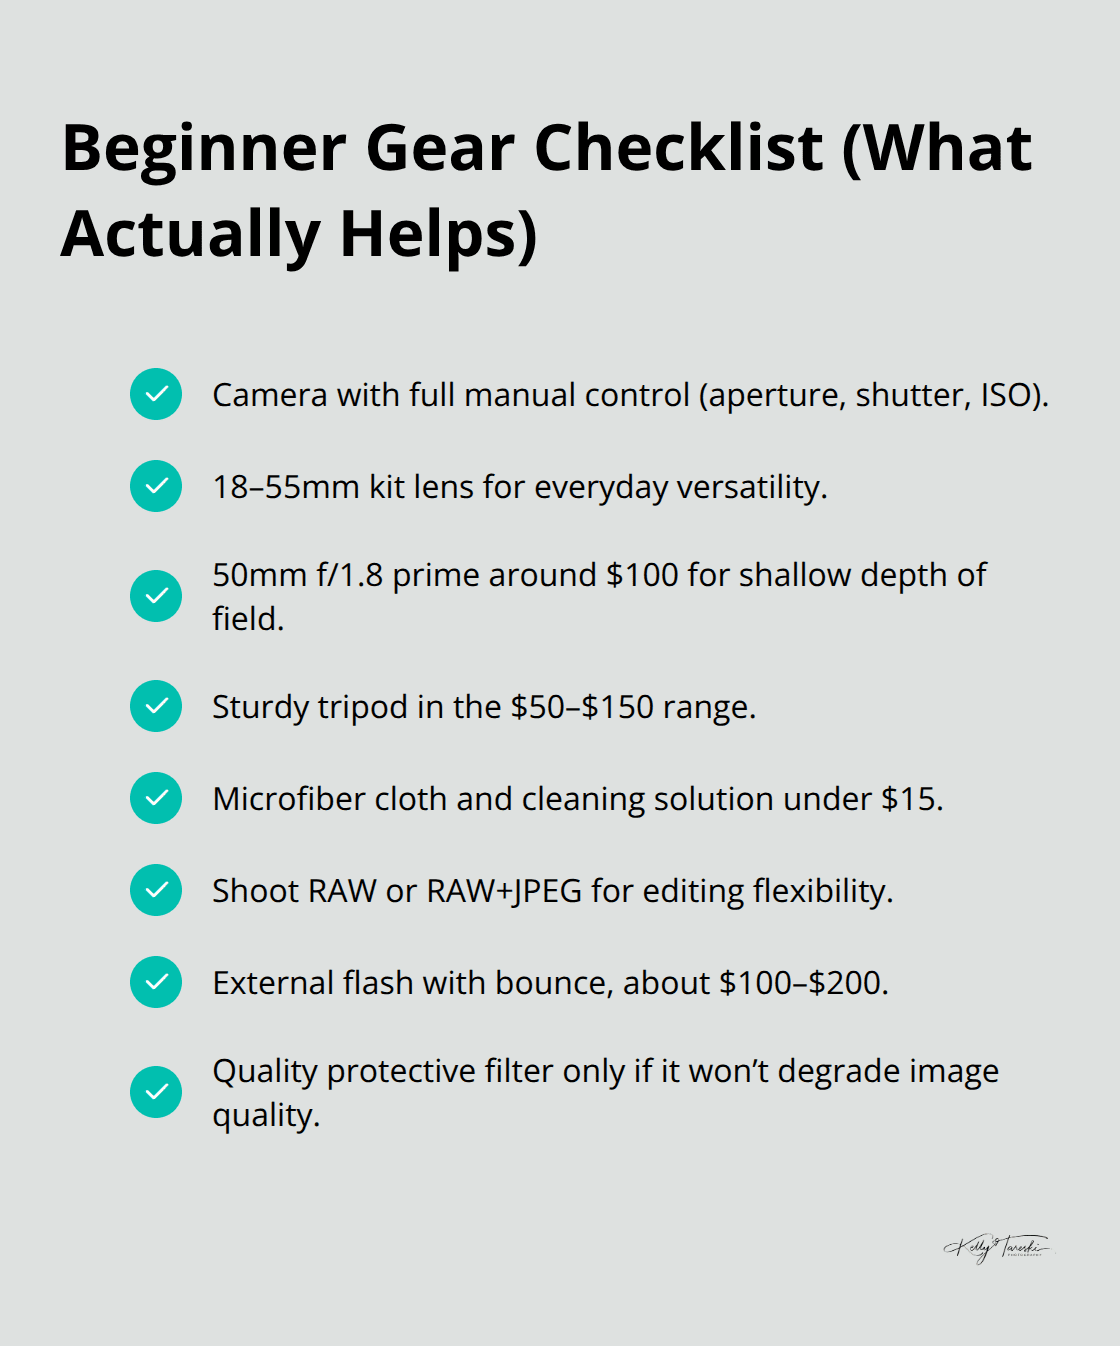
You do not need an expensive camera to start. What matters is that your camera has a manual mode where you can adjust aperture, shutter speed, and ISO independently. Entry-level DSLRs and mirrorless cameras from Canon, Nikon, and Sony all deliver this control at reasonable prices. An older used DSLR from five or ten years ago will teach you fundamentals just as well as the latest flagship model because the exposure triangle hasn’t changed.
Focus instead on getting a versatile lens-an 18-55mm kit lens covers most beginner situations, though a 50mm f/1.8 prime lens costs around 100 dollars and gives you a wider aperture for learning depth of field. Shoot RAW or RAW plus JPEG so you capture unprocessed sensor data that gives you maximum flexibility in post-processing to fix exposure mistakes. Avoid the temptation to chase new gear; skill development matters infinitely more than equipment at this stage. Once you master these three settings and understand how they interact, you’re ready to apply them to real-world shooting scenarios where composition and light quality determine whether your images stand out.
Mastering Composition and Lighting Techniques
Rule of Thirds and Framing Strategies
Composition separates a snapshot from a photograph worth keeping. The Rule of Thirds works because it matches how human eyes naturally scan images-place your main subject on one of the four intersecting lines rather than dead center, and your photos instantly feel more intentional. When you shoot a landscape, position the horizon on the upper or lower third line instead of splitting the frame in half; this simple shift makes skies feel more dramatic or foregrounds feel more grounded. Leading lines like roads, fences, or rivers guide viewers directly into your image, creating depth and movement that pulls people through the frame. Curves and diagonal lines feel more dynamic than horizontal or vertical lines, which is why an S-curve path through a field works better compositionally than a straight one.
The edges of your frame matter as much as the center-avoid cutting off heads, hands, or important details at the borders, and give your subject breathing room so the image doesn’t feel cramped. Move your feet constantly. Change your camera height or angle to transform the entire story; shoot wildlife at eye level rather than above or below, and step left or right to eliminate distracting backgrounds. Symmetry and patterns catch attention instantly, but asymmetry feels more natural and interesting for most situations.
Light Quality Determines Your Image Impact
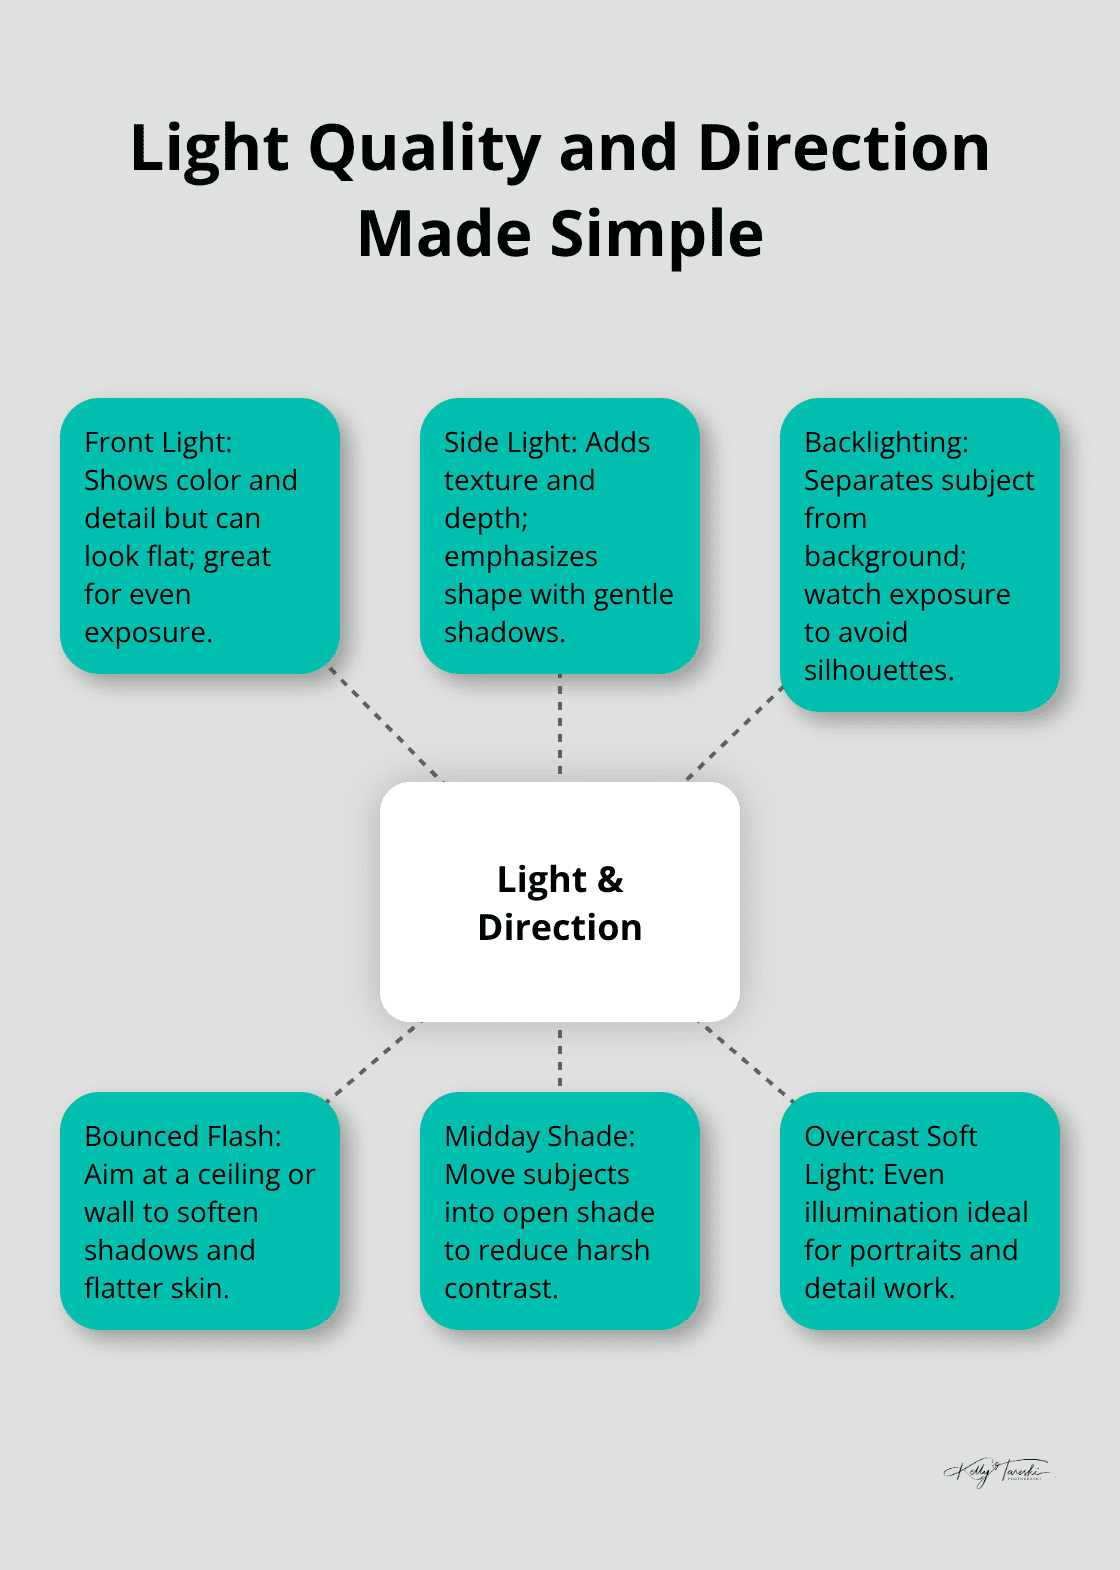
Light quality matters far more than whether it comes from the sun or a flash. Golden hour light is warm, directional, and forgiving; it flatters skin tones and creates dimension that harsh midday sun simply cannot match. If you must shoot in bright midday conditions, position your subject in shade or use a reflector to bounce light onto their face and reduce harsh shadows. Soft light from overcast skies or north-facing shade produces even exposure without blown highlights, making it ideal for portraits and detail work.
Artificial light gives you complete control-an external flash bounced off a ceiling or wall produces softer, more flattering results than direct on-camera flash, which creates flat, unflattering images with hard shadows. Understand light direction: front light shows detail and color, side light creates dimension and texture, and backlighting separates your subject from the background but requires careful exposure to avoid silhouettes.
Exposure and Composition Work Together
Check your histogram or enable zebra warnings on your camera to spot blown highlights before they ruin a shot; if highlights are clipping, reduce ISO, use a faster shutter speed, or stop down your aperture. Beginners often ignore the foreground and background, creating images where subjects float in empty space; include context and supporting elements that strengthen your story. Avoid centered compositions where everything is equally sharp and equally bright-decide what matters most and let everything else support that choice.
The light in front of you is always better than the light you imagined, so adapt your vision to what’s actually available rather than force an idea that doesn’t fit the moment. Once you master these composition and lighting principles, you’re ready to explore the gear and accessories that support your creative vision without overwhelming your budget or workflow.
Essential Gear and Equipment for New Photographers
A Tripod Solves More Problems Than Any Camera Upgrade
A tripod eliminates camera shake and delivers consistency that handheld shooting cannot match. If you shoot slower shutter speeds, work in low light, or attempt long exposures, a tripod becomes indispensable. A sturdy tripod costs between $50 and $150 and outlasts three camera bodies. Avoid extending the center column too early, which destabilizes the rig, and balance the legs on uneven ground by adjusting individual leg angles rather than relying on the center column for height. You’ll use this tool constantly once you own one, especially when experimenting with landscape photography or shooting in dim indoor conditions where shutter speeds drop below 1/60 second.
Keep Your Lens Clean and Protected
A microfiber cloth and lens cleaning solution prevent blurry shots caused by dust or fingerprints on your front element. This costs less than $15 and fits in your camera bag, yet a dirty lens destroys image sharpness faster than any settings mistake. Cheap filters sound appealing until corner blurring and internal flare ruin your shots; if you use a filter at all, choose a reputable brand like B+W rather than saving $10 on a low-quality option that degrades image quality.
External Flash Transforms Low-Light Work
An external flash with bounce capability transforms your indoor and low-light photography because bouncing light off a ceiling creates soft, flattering illumination instead of the harsh, flat shadows that on-camera flash produces. Budget models from Canon or Nikon run $100 to $200 and offer vastly more control than built-in flash.
Start With What You Have
Your current camera, whatever it is, teaches fundamentals better than waiting for the perfect gear. Shoot RAW or RAW plus JPEG format to capture maximum detail that gives you flexibility in post-processing when you inevitably expose slightly too bright or too dark. A 50mm f/1.8 prime lens costs around $100 and teaches depth of field better than kit lenses because the wider maximum aperture forces you to understand how aperture affects your images. An 18-55mm kit lens covers most situations and remains useful even after you purchase additional glass, so do not feel pressured to replace it immediately.
Upgrades Come After Mastery
Investing in a second lens, a better tripod, or lighting equipment makes sense only after you consistently nail exposure, composition, and focus with your current setup. Most beginners waste money on gear they do not understand how to use. Spend six months shooting in manual mode, studying your histogram, and refining composition before considering a telephoto lens or advanced lighting kit. Once you identify specific limitations in your current gear (perhaps you need faster autofocus for wildlife or a wider aperture for portraits), research targeted upgrades that solve real problems you have encountered, not imaginary ones you think you might face.
Final Thoughts
You now possess the foundation that separates intentional photographers from casual shooters. The exposure triangle, composition principles, and gear knowledge you’ve absorbed form the backbone of every photograph worth taking. Photography education basics matter because they teach you to see light, anticipate moments, and make deliberate choices instead of hoping your camera figures things out for you.
Shoot consistently in manual mode and pick one subject-a landscape, a friend, your pet-then photograph it under different lighting conditions while adjusting aperture, shutter speed, and ISO. Review your results and identify what worked and what didn’t, because this hands-on practice embeds the exposure triangle into your muscle memory faster than any article can teach it. After two or three weeks of regular shooting, study your best images and ask why they work-did the composition follow the Rule of Thirds, was the light directional or flat, did you nail focus and exposure?
Join photography communities online (Reddit’s r/photography welcomes beginners and offers feedback on your work) and share images while you ask questions and study how experienced photographers solve problems you face. We at Kelly Tareski Photography offer personalized sessions that showcase how professionals apply these fundamentals in real-world situations, and observing a professional workflow teaches lessons that books cannot convey-visit Kelly Tareski Photography to explore how experience and intentional technique create images that last.
Education Most Searched Articles
- Kelly Tareski Photography Homepage
- How to Choose Background Colors to Complement Skin Tones
- Choosing the Best Lens for Stunning Senior Portraits
- 5 Tips Using the Nikon Z7ii Camera for Portrait Photography
- Exploring Spokane Through a Lens: Must-Visit Photo Locations
- How to Choose the Best Lenses for Senior Portraits
- When to Use a Neutral Background in Photography
- Top Posing Ideas for Solo Portraits: Looking Confident and Natural
- The Economy and Photography
- How the Economy Impacts Photography
- How to Weather Economic Slumps as a Photographer
- Finding Creative Ways to Promote Your Photography on a Budget
- Free and Low-Cost Resources for Photographers