
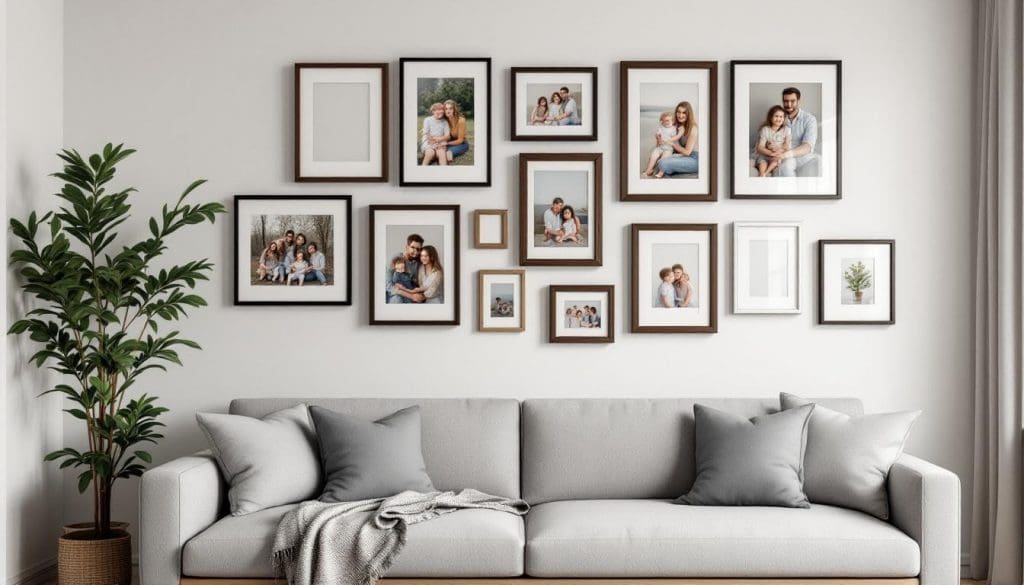
How to Create Gallery Walls for Family Photos
To create a family photo gallery wall, choose the photographs first, measure the outside dimensions of their frames, and test the complete arrangement before installing anything. Use a consistent grid or a looser grouping, depending on your room and the images you want to display. There is no required frame count, hanging height, or mix of candid and posed portraits.
I am Kelly Tareski, a family photographer in Nine Mile Falls near Spokane. A gallery wall lets several relationships and moments share a space in your home. This guide covers arranging a multi-frame wall. For deciding whether a room needs one portrait or a larger collection, start with planning a family photo wall display.
Choose photographs that contribute something different
Begin with a main image and a small selection of supporting photographs. A full-family portrait might sit beside siblings together and a parent-and-child image. Another collection might trace several years or bring older and newer family photographs together.
Posed portraits and candid moments can both belong. Choose the expressions and relationships you recognize rather than applying a percentage rule. Compare similar images together and ask whether a second photograph adds a different person, interaction, or detail. The family photo selection guide offers a useful way to narrow a collection, even when the final display is a wall rather than an album.
Measure the usable wall and the complete frames
Record the space available around furniture, doors, switches, and other objects that will stay in place. Consider where you normally stand or sit to view the photographs. A hallway arrangement and a collection above a sofa may need different proportions.
Measure the outside width and height of every frame, including any mat and border. A print described as 8 by 10 inches does not tell you the final framed dimensions. Check the actual product before planning the gaps or ordering a complete set.
For a rectangular grid, calculate the total width from the frame widths plus the spaces between them. As an example, three frames that are each 18 inches wide, separated by two 2-inch gaps, need 58 inches of width. Two rows of frames that are each 22 inches high, with a 2-inch gap between rows, need 46 inches of height. These are sample measurements, not recommended dimensions for every wall.
Choose a grid or an informal arrangement
A grid for a consistent structure
A grid uses aligned rows and columns, often with matching outside frame dimensions. It can work for a sequence of related portraits or photographs from several years. Check every crop before choosing identical frames: a square opening may remove important details from a photograph composed horizontally.
An informal arrangement for varied images
An informal grouping can combine different frame sizes and orientations. Place the image you want noticed first, then arrange the supporting photographs around it. That main image can be centered or off-center; choose based on the complete composition rather than a fixed rule.
Repeat a finish, mat color, or other detail when it helps connect the collection. Matching every frame is optional, and mixed frames are not inherently more interesting than a uniform set. Keep the choice consistent with the photographs and the room.
Preview the layout before making holes
Arrange the frames on a clear floor or another suitable surface. Then make paper templates using the outside frame dimensions. Label them so you know which image belongs in each position.
- Place the main template within the usable wall area.
- Add the supporting templates and test the spaces between them.
- View the arrangement from the positions where you normally use the room.
- Check that faces and important details remain readable at the proposed print sizes.
- Adjust the layout before transferring any hanging measurements.
Use a surface-appropriate way to temporarily position templates and test it first. The top of a frame is not necessarily where its hook or wire rests. Measure the mounting position on each actual frame rather than treating the template’s top edge as the nail location.
Match the installation method to the frame and wall
Choose hardware for the finished frame’s weight, its mounting system, the wall material, and the installation location. Follow the frame and hardware manufacturers’ instructions. A single weight threshold does not determine the right fixing for every wall, and adding extra adhesive strips is not a substitute for following the rated product instructions.
For example, Command’s picture-hanging-strip instructions specify surface preparation and product limitations, including restrictions on use over beds, on wallpaper, and with valuable or irreplaceable items. Do not assume that a product described as removable is appropriate for every painted surface or treasured original.
For heavy artwork, uncertain wall construction, or difficult-to-reach locations, use a qualified installer. Keep furniture and door movement in mind and do not improvise a mounting system from general decorating advice.
Check the complete display after installation
Use a level and recheck the intended spacing. Correct a visibly crooked frame rather than leaving it because a rule says one imperfect frame is acceptable. Confirm that each frame is secure before considering the display finished.
Keep a photograph of the arrangement and a note of the frame dimensions. That makes later substitutions easier. You do not need to replace images annually; add or change a photograph when it contributes something you want to see.
Questions about family photo gallery walls
How many photographs should a gallery wall contain?
There is no universal number. Begin with a small selection, test the actual framed dimensions, and add images only when the wall and the story benefit. Leave photographs for an album when they make the wall feel crowded.
Can color and black-and-white photographs share a wall?
Yes. A repeated frame finish, consistent matting, or a shared family connection can unite different treatments. Do not change a meaningful image solely to satisfy a matching rule.
What can I use instead of a gallery wall?
One larger portrait, an album, or a smaller tabletop display may suit your home better. Explore arranging family photographs on shelves and tables for alternatives.
Plan portraits for the space you have
Bring a photograph and measurements of the intended wall when discussing artwork. Explore my family portrait sessions near Spokane, review portrait investment information, or contact Kelly Tareski Photography to discuss the people and photographs you would like to display.
Education Most Searched Articles
- Kelly Tareski Photography Homepage
- How to Choose Background Colors to Complement Skin Tones
- Choosing the Best Lens for Stunning Senior Portraits
- 5 Tips Using the Nikon Z7ii Camera for Portrait Photography
- Exploring Spokane Through a Lens: Must-Visit Photo Locations
- How to Choose the Best Lenses for Senior Portraits
- When to Use a Neutral Background in Photography
- Top Posing Ideas for Solo Portraits: Looking Confident and Natural
- The Economy and Photography
- How the Economy Impacts Photography
- How to Weather Economic Slumps as a Photographer
- Finding Creative Ways to Promote Your Photography on a Budget
- Free and Low-Cost Resources for Photographers