
Advanced Photography Skills: Techniques to Improve Your Photos
Advanced photography skills develop when you move beyond simply accepting the camera’s default decisions and begin making deliberate choices about exposure, focus, motion, light, composition, and editing.
At Kelly Tareski Photography, I treat technical control as a way to support the image rather than as a badge of expertise. Understanding how the camera responds gives you more options when the light, subject, or creative goal changes.
Quick Answer: What Skills Help a Photographer Move Beyond the Basics?
Advanced photography is less about memorizing more settings and more about controlling light, focus, motion, composition, color, and editing with consistency. I look for repeatable decision-making: knowing why I chose a focal length, light direction, shutter speed, point of view, or editing approach and being able to adapt when the conditions change.
You can build those skills one topic at a time through my photography education resources.
Why Exposure Control Matters Beyond Auto Mode
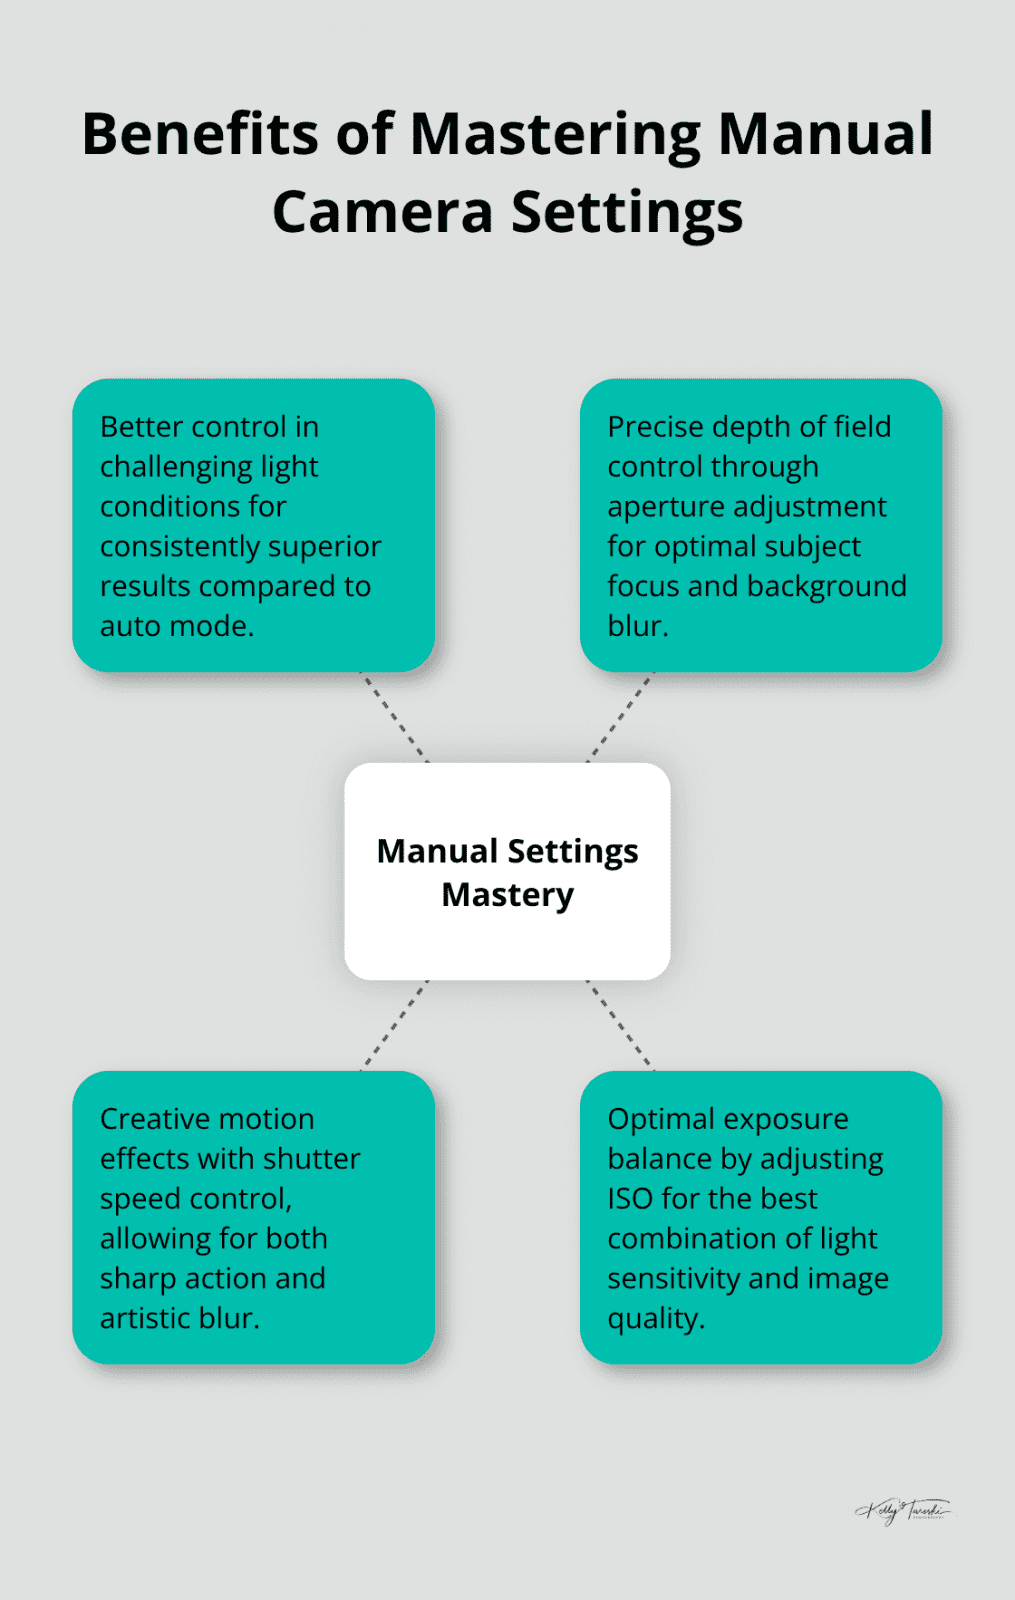
Advanced photography is not defined by using manual mode all the time. It comes from understanding what aperture, shutter speed, ISO, metering, focus, and light are doing so you can decide when to take control and when an automatic or priority mode will respond faster. The goal is repeatable intent: choosing settings because they support the subject, motion, depth of field, and available light.
Aperture Control Beyond Background Blur
Aperture affects depth of field, light transmission, lens rendering, and how much of the scene appears acceptably sharp. A wide aperture can isolate a subject and help in lower light, while a smaller aperture can increase depth of field when the composition needs it. The best setting depends on subject distance, focal length, sensor size, lens behavior, and how much detail you want in focus.
Instead of memorizing one “sweet spot,” test the lenses you actually use. Many lenses sharpen as they are stopped down from maximum aperture, while very small apertures can introduce diffraction. The useful compromise varies by lens and by the photograph you are trying to make.
Shutter Speed for Creative Control
Shutter speed controls motion and camera shake. For handheld shots, the reciprocal rule can be a useful starting point, but stabilization, sensor resolution, technique, crop factor, and subject movement can all change the shutter speed you need. Creative motion blur also depends on the subject and the amount of movement you want to record, so test the result instead of relying on fixed shutter-speed thresholds.
Panning can work across a range of shutter speeds depending on subject speed, focal length, distance, and how much background motion you want. Image stabilization can expand handheld options on supported equipment, but its effectiveness varies by camera, lens, stabilization mode, technique, and whether the subject itself is moving.
ISO Strategy for Modern Sensors
High-ISO performance varies by camera, exposure, output size, and how much shadow detail you need to recover. Do not treat one ISO number as a universal quality limit. When the choice is between unwanted motion blur and more visible noise, raising ISO can be the better decision, but test your own camera so you know what tradeoffs are acceptable for your work.
Noise reduction can help, but it cannot restore detail lost to missed focus or unintended motion. In low-light photography and specialized techniques such as silhouette photography, the important skill is understanding exposure well enough to choose the mode and settings that protect the result you want. These technical foundations prepare you for more deliberate composition and lighting choices.
How Advanced Composition Techniques Transform Your Photography
Manual camera mastery creates the foundation, but composition techniques transform technically correct images into emotionally powerful photographs. Professional photographers understand that breaking traditional rules often produces stronger visual impact than following them blindly.
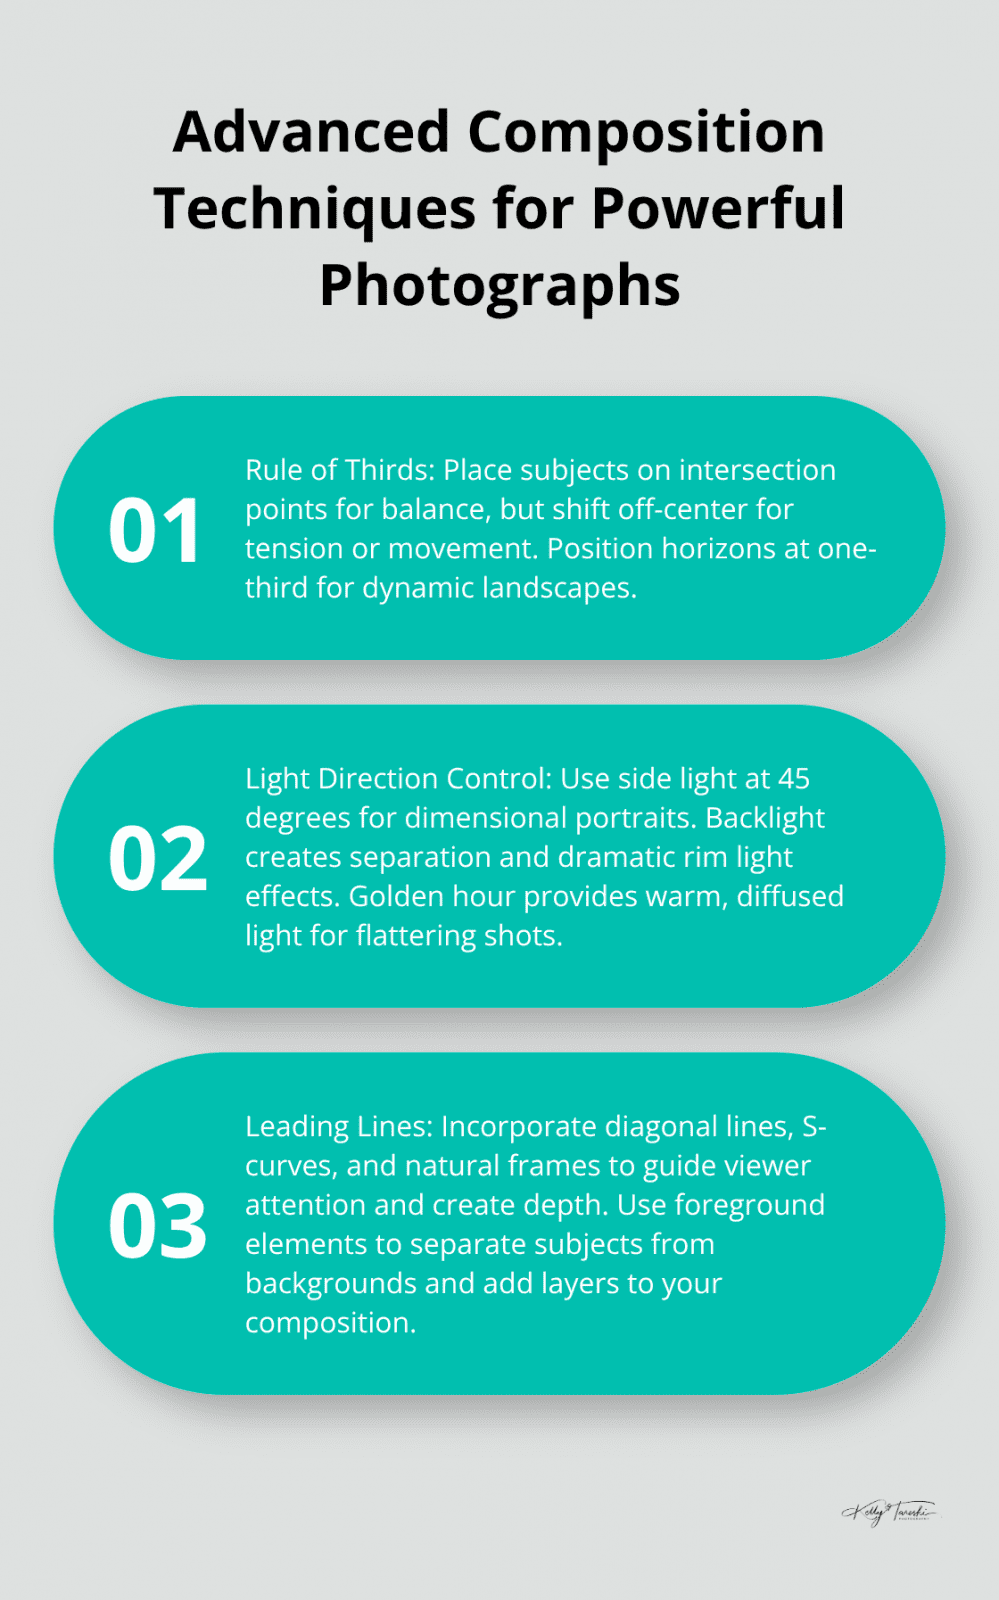
The rule of thirds serves as a starting point, not an endpoint. Place subjects on intersection points for balanced compositions, but shift them off-center when you want tension or movement. Placing a horizon or subject off-center can create tension, direction, or visual balance, while a centered composition can emphasize symmetry, stability, or formality. The stronger choice depends on the subject and what you want the viewer to notice.
Strategic Light Direction Controls Mood
Light direction changes shadow shape, contrast, texture, and mood. Front light can reduce visible shadow depth, side light can create stronger dimension, and backlight can separate a subject from the background. None of those directions is automatically better; the useful choice depends on the face, scene, background, and visual goal.
Portrait lighting patterns can be created from many key-light positions, and small changes in height and angle can substantially change facial shadows. Window light, direct sun, open shade, overcast light, flash, and continuous light can all be useful when they support the intended portrait. Evaluate the actual light on the subject instead of treating one angle or time of day as universally optimal.
Leading Lines Guide Visual Flow
Leading lines guide viewer attention through compositions more effectively than random placement. Railroad tracks, rivers, and architectural elements create strong diagonal lines that add depth. S-curves in roads or streams produce more engaging compositions than straight lines.
Natural frames like tree branches, doorways, or rock formations focus attention on subjects while adding context. Position frames in foreground elements to create layered compositions that separate subjects from backgrounds. Diagonal compositions feel more dynamic than horizontal or vertical orientations (they create energy that static arrangements lack).
Breaking Rules Creates Impact
Professional landscape photographers use foreground rocks or vegetation to create depth layers that lead eyes toward main subjects. Symmetrical compositions work well for architectural photography, while asymmetrical arrangements suit portraits and street photography better.
Center subjects when you want stability and calm. Place them at frame edges when you want tension or movement. Fill the frame completely for intimate portraits, or leave negative space for contemplative moods. These composition principles prepare your images for the final step that separates amateur work from professional results: post-processing techniques that enhance your creative vision.
When RAW Processing Gives You More Editing Flexibility
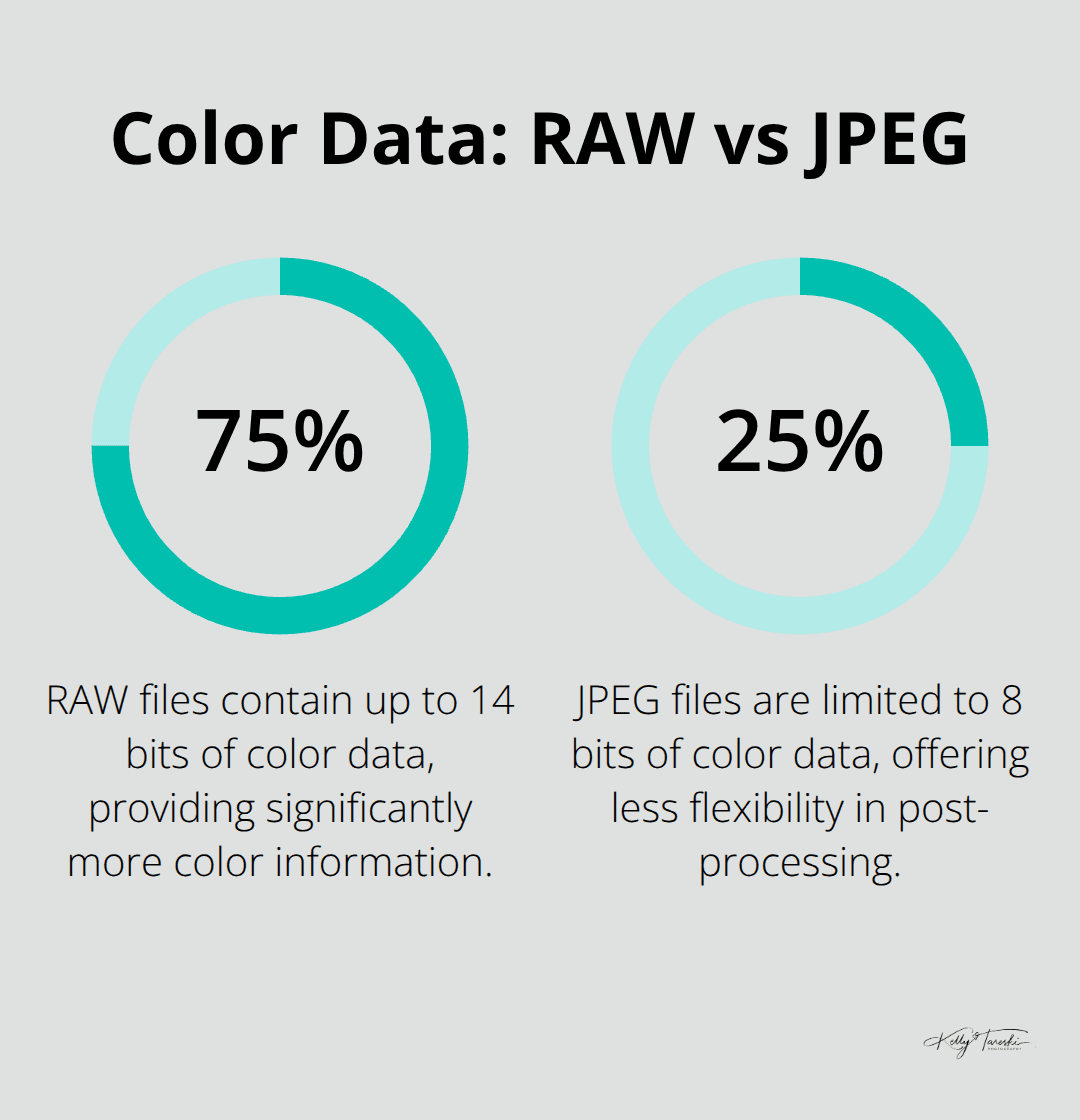
RAW files can preserve more tonal and color information than an in-camera JPEG, giving you more flexibility for white balance, highlight recovery, shadow adjustments, and color work. That does not mean every professional must shoot RAW for every assignment; JPEG can be appropriate when speed, file size, or a finished in-camera look matters more. Choose the file format around the job and the amount of post-production latitude you need. Lightroom, Adobe Camera Raw, Capture One, and other RAW processors each have different workflows and rendering options, so use the one that fits your cameras and editing process.
Color Correction Transforms Average Images
White balance correction in RAW files fixes color casts that auto settings miss. Different light sources can create warm or cool color casts, and the useful white-balance value varies with the source, camera, and creative intent. Use a neutral reference when accurate color matters, then fine-tune the result rather than assuming one Kelvin value fits every scene. Vibrance increases saturation in understated colors while it protects already-saturated areas (unlike the saturation slider which affects all colors equally). Professional colorists use luminosity masks to target specific tonal ranges for precise color adjustments without affecting the entire image.
Strategic Retouching Preserves Natural Quality
Frequency separation divides images into high and low spatial frequencies. This allows texture preservation during skin smoothing. Work on low-frequency layers for color and tone corrections, high-frequency layers for texture details. Clone stamp tool works best for small distractions, while content-aware fill handles larger objects effectively. Strong retouching often depends on restrained, targeted adjustments that preserve believable texture, shape, and color rather than relying on dramatic changes across the entire image.
Advanced Techniques Create Professional Polish
Dodge and burn techniques with 50% gray layers on soft light blend mode create natural-looking dimensional improvements. These mimic professional lighting setups without artificial appearance. Luminosity masks use brightness or color to create subtle masks from the image itself for precise control over highlights, midtones, and shadows. Color grading in the shadows and highlights adds cinematic quality that separates professional work from amateur attempts (most photographers overlook this powerful technique).
Final Thoughts
Advanced photography demands consistent practice with manual settings, composition techniques, and post-processing workflows. Professional photographers develop these skills through deliberate practice rather than random shots. Set weekly goals for specific camera techniques like aperture priority mode or leading line compositions.
Build your portfolio systematically when you focus on one specialty area first. Portrait photographers master light patterns before they expand to other genres. Document your progress through before-and-after comparisons that show technical improvement over time (experienced shooters provide constructive feedback when you join photography communities).
At Kelly Tareski Photography, I use technical control to support the portrait rather than become the point of it. A recognizable photographic voice develops through practice, review, experimentation, and consistent choices.
Advanced Photography Skills FAQ
What should I practice after learning manual exposure?
Work on light direction, focus consistency, subject movement, composition, posing, color, and repeatable editing. Pick one skill at a time and compare your results instead of trying to improve everything at once.
Do advanced photographers always use manual mode?
No. Advanced photographers choose the camera mode that fits the situation. The important skill is understanding exposure and knowing when to take direct control.
Education Most Searched Articles
- Kelly Tareski Photography Homepage
- How to Choose Background Colors to Complement Skin Tones
- Choosing the Best Lens for Stunning Senior Portraits
- 5 Tips Using the Nikon Z7ii Camera for Portrait Photography
- Exploring Spokane Through a Lens: Must-Visit Photo Locations
- How to Choose the Best Lenses for Senior Portraits
- When to Use a Neutral Background in Photography
- Top Posing Ideas for Solo Portraits: Looking Confident and Natural
- The Economy and Photography
- How the Economy Impacts Photography
- How to Weather Economic Slumps as a Photographer
- Finding Creative Ways to Promote Your Photography on a Budget
- Free and Low-Cost Resources for Photographers