Top 10 Photography Tips for Beginners
Let's Roll!
Top 10 Photography Tips for Beginners: At Kelly Tareski Photography, we believe everyone has the potential to capture stunning images. Our guide to photography education for beginners is designed to help you unlock your creative vision.
In this post, we'll share our top 10 tips to jumpstart your photography journey. These practical techniques will help you master your camera and develop your unique style.
1. Master Your Camera's Basic Settings
Understanding your camera's fundamental settings forms the foundation of your photography journey. The three pillars of exposure - aperture, shutter speed, and ISO - control how light enters your camera and shapes your images. Start with Auto mode, then progress to Aperture Priority, Shutter Priority, and Manual mode as your skills improve. Each mode offers unique advantages for different shooting scenarios.
Hands-on practice is key to mastering these concepts. Adjust your aperture to control depth of field; a wider aperture (smaller f-number) creates a blurred background, ideal for portraits. Experiment with shutter speed to freeze action or create motion blur. Modify ISO to brighten shots in low light, but watch for increased grain at higher values. As you practice, you'll develop an intuitive grasp of how to achieve desired effects in your photographs. These skills will prove invaluable as you move on to explore composition techniques, such as the rule of thirds.
2. Rule of Thirds for Balanced Compositions
The rule of thirds transforms ordinary photos into visually striking images. This technique involves dividing an image into thirds, both horizontally and vertically, to create a grid of nine equal parts. Place your main subject along these lines or at their intersections to create more dynamic compositions. This principle works effectively for various photography styles, including landscapes, portraits, and street scenes.
To apply this rule, activate your camera's grid overlay feature. Most modern smartphone cameras can overlay the lines over the screen before taking the photo. Position a person's eyes along the top horizontal line or a horizon on the bottom third of your frame. For added interest, place secondary elements at other intersections. The rule of thirds helps create balanced, engaging compositions that tell a story and captivate your audience. However, rules exist to be broken, so once you master this technique, feel free to experiment with different placements. As you perfect your composition skills, you'll want to explore how lighting conditions can further enhance your images.
3. Harness the Power of Light
Light shapes the essence of photography. The golden hour, roughly the first hour after sunrise and the last hour before sunset, offers soft, warm light that flatters subjects and creates stunning landscapes. Plan your shoots around these times and use a weather app to predict optimal conditions. For indoor photography, master artificial lighting techniques. Start with a basic three-point lighting setup: key light, fill light, and backlight. This arrangement creates depth and dimension in your subjects.
Reflectors and diffusers control light effectively. A simple white reflector bounces light onto shadowed areas, while a diffuser softens harsh sunlight. Practice using these tools in various scenarios to understand their effects on your images. For example, use a silver reflector to add a cool tone to portraits or a gold reflector for a warmer glow. As you gain confidence with lighting techniques, you'll create professional-looking images in any environment.
The next step in your photography journey involves mastering composition techniques to elevate your images from good to great.
4. Elevate Your Images with Composition
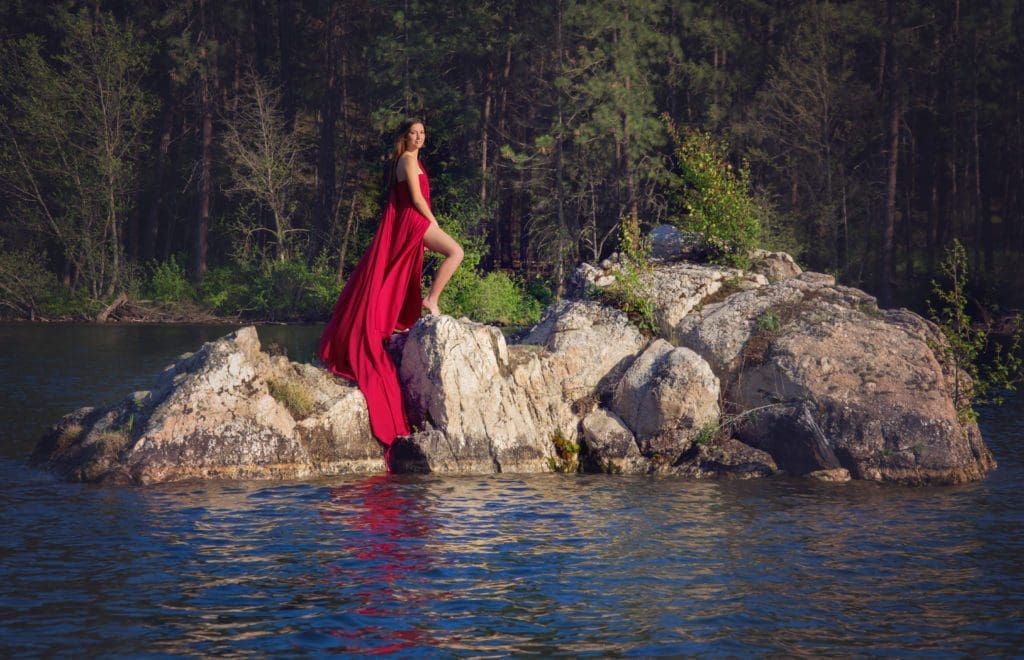
Composition techniques transform ordinary snapshots into captivating visual stories. Leading lines guide viewers' eyes through an image, creating depth and movement in your photos. In urban settings, use streets or buildings to direct attention. In nature, rivers, fences, or fallen trees serve as natural leading lines. Framing adds context and draws focus to your subject. Doorways, arches, or overhanging branches create natural frames that add layers to your composition. To create depth, incorporate foreground elements. A flower in the foreground of a landscape shot adds dimension and scale. In portraits, position your subject behind objects in the foreground to create a sense of environment and story.
Experiment with these techniques in various scenarios to develop your unique style. When you shoot landscapes, use a wide-angle lens to emphasize foreground elements and create a sense of vastness. For portraits, try framing your subject with environmental elements to tell a story about their personality or profession. Composition guides the viewer's eye and creates visual interest. As you practice these techniques, you'll develop an intuitive sense of how to arrange elements within your frame for maximum impact. The next step in your photography journey involves training your eye to spot the small details that can make a big difference in your images.
5. Sharpen Your Eye for Detail
A keen eye for detail transforms ordinary photos into extraordinary images. Focus is a crucial element that can make or break a photograph. Areas that are sharp and in focus will draw the viewer's attention to the subject you're showing. Start by observing your surroundings closely. Notice textures, patterns, and small elements that often go unnoticed. Get closer to your subjects to capture intricate details. Use a macro lens or your camera's macro mode to photograph tiny objects, revealing a world invisible to the naked eye. Experiment with different angles and lighting to highlight textures in everyday items like fabric, leaves, or food.
Challenge yourself to a texture scavenger hunt to enhance your skills. Negative space drawing exercises can train your brain to see in 2D, which can significantly improve your photo composition skills. Spend an hour in one location and photograph as many different textures as possible. This exercise trains your eye to spot interesting details and pushes you to find beauty in unexpected places. When editing, pay attention to sharpening and contrast adjustments to make textures pop. A single dewdrop on a petal or the intricate pattern of a butterfly's wing can transform a good photo into a great one.
As you master the art of capturing details, try these techniques to further enhance your photography skills:
- Look for patterns in nature and architecture
- Focus on textures in everyday objects
- Capture reflections in water or glass surfaces
- Highlight contrasts between light and shadow
Your newfound attention to detail will serve you well as we explore different perspectives in the next section.
6. Shake Up Your Angles
Change your perspective to transform your photography. The five essential angles for photographers to know include bird's-eye view, high angle, face to face, low angle, and bug's-eye view. Get down low for a worm's eye view, making subjects appear larger than life. This technique excels in pet photography or capturing architectural grandeur. Climb to high vantage points for bird's eye views, revealing hidden patterns and compositions. Urban photographers often access rooftops or balconies for unique cityscapes. Tilt your camera to create dynamic diagonal lines, adding energy to static scenes.
Focal length impacts perspective significantly. Focal length affects composition in the same way that cropping does, and crop factor on the sensor can compensate for this effect. Wide-angle lenses exaggerate the distance between foreground and background, ideal for vast landscapes or creating depth in tight spaces. Telephoto lenses compress perspective, making distant objects appear closer together (perfect for isolating subjects in wildlife or sports photography). Try these fresh perspectives to inject creativity into your work:
- Photograph flowers from underneath
- Capture portraits from above
- Shoot street scenes from hip level
These unconventional angles will help you develop a unique photographic voice. As you master new perspectives, you'll want to enhance your images further through post-processing techniques.
7. Master Post-Processing Basics
Post-processing transforms good photos into great ones. Adobe Lightroom and GIMP (a free alternative) offer powerful tools to enhance your images. While GIMP offers non-destructive editing capabilities through layers and layer masks, it's not as straightforward as Lightroom. Start with fundamental adjustments: exposure brightens or darkens, contrast adds depth, and color balance achieves natural tones. The clarity slider enhances texture and detail by increasing midtone contrast, which in turn increases the tactility and apparent sharpness of the image. Advanced techniques like selective editing and local adjustments allow you to fine-tune specific areas of your image.
Subtlety is key in post-processing. Try to enhance your images without making them look artificial. A useful technique is to step away from your edit for a few minutes, then return with fresh eyes to ensure you haven't gone overboard. As you practice, you'll develop a unique editing style that complements your photography skills and vision. Consider these basic post-processing steps:
- Adjust exposure and contrast
- Fine-tune color balance
- Enhance clarity and sharpness (in moderation)
- Apply selective edits to specific areas
Mastering these techniques will significantly improve your final images. As you refine your post-processing skills, you'll want to practice regularly to solidify your newfound knowledge.
8. Commit to Daily Photography Practice
Consistent practice forms the foundation of photographic improvement. Set aside at least 30 minutes each day for photography, even if you only shoot in your backyard or living room. Challenge yourself with a 365 project: take and share one photo every day for a year. This commitment will push you to find beauty in the mundane and force you to experiment with different techniques.
Document your progress meticulously. Keep a photography journal where you note camera settings, lighting conditions, and your thoughts on each shot. This record will become invaluable as you review your work and identify areas for improvement. Don't avoid mistakes; they are your greatest teachers. Analyze why certain shots didn't work and brainstorm solutions for next time. Share your journey on social media platforms or join online photography communities for feedback and motivation. Every professional photographer started as a beginner, and your dedication to daily practice will steadily elevate your skills.
To further enhance your learning experience, try these practical exercises:
- Photograph the same subject in 10 different ways
- Experiment with various lighting setups (natural, artificial, mixed)
- Practice different composition techniques (rule of thirds, leading lines, symmetry)
As you hone your skills through daily practice, you'll develop a keen eye for exceptional photography. This newfound appreciation will lead you to study the work of professional photographers, which we'll explore in the next section.
9. Learn from Photography Masters
Professional photographers offer a wealth of knowledge for aspiring artists. Select photographers whose style resonates with you, such as Annie Leibovitz for her signature sultry style and sharp focus, or Ansel Adams for landscapes. Analyze their images closely, noting composition, lighting, and subject placement. Pay attention to their use of color, contrast, and negative space to create impact. Steve McCurry's vibrant colors in National Geographic work can inspire your approach to travel photography.
Explore different photography genres to broaden your horizons:
- Street photography
- Fashion
- Wildlife
- Fine art
Each genre has unique techniques to learn from. Try to emulate the styles you admire in your own work. If you like Michael Kenna's minimalist landscapes, practice long exposures and experiment with black and white photography. Apply the dramatic lighting techniques like the black booth technique or "subtractive lighting" to your own shoots (without copying their work directly). This study of masters will provide insights to elevate your photography skills. As you absorb these lessons, you'll find yourself ready to connect with other photographers and share your growing expertise.
10. Connect with Fellow Photographers
Photography thrives on community. Local meetups and workshops offer hands-on learning experiences and networking opportunities. Websites list photography groups in your area, ranging from beginner-friendly outings to specialized genre workshops. Online platforms provide global exposure for your work and connect you with photographers worldwide. These platforms often host challenges and themed contests, which push you to explore new techniques and subjects.
Constructive feedback accelerates growth. Share your work on forums or join groups dedicated to photography feedback. When you seek critique, be specific about areas you want to improve. Collaborate with other photographers to expand your skillset rapidly. Organize photo walks to exchange tips and tricks in real-time. Consider these ways to connect:
- Join local photography clubs
- Participate in online photo challenges
- Attend workshops or seminars (Kelly Tareski Photography offers excellent options in Spokane, Washington)
- Engage in photography forums for feedback
Your interactions with fellow photographers will inspire you to continue developing your skills and exploring new creative avenues.

That's a Wrap!
Photography education for beginners opens a world of creative possibilities. Your journey starts with consistent practice and a willingness to learn from every photograph you take. As you apply these ten tips, you will develop your unique artistic voice and refine your skills with each shot.
Photography captures moments, emotions, and stories in a single frame. Your dedication and passion will soon produce images that please your eye and touch the hearts of others. Every professional photographer started as a beginner, and your unique journey brings you closer to realizing your creative vision with each step.
At Kelly Tareski Photography, we understand the transformative power of photography. Our team helps aspiring photographers unlock their potential and create stunning images. With over two decades of experience, we offer personalized services to guide you on your photographic journey (visit Kelly Tareski Photography for more information). Top 10 Photography Tips for Beginners
Related Articles to Education
-
Preparing For Your Family Photos – Spokane
-
Spokane Photography – Showcasing a Region
-
Spokane Photographers – How To Choose
-
More about Children’s Photography In Spokane
-
What is a Professional Photographer?
-
The Importance of Senior Portrait Photography Spokane
-
Legacy Portrait Photography in Spokane
-
Prepare with Pinterest Spokane Boudoir
-
Choosing Professional Portrait Photography Spokane
-
The Importance of Children’s Photography in Spokane
-
How to Choose A Photographer In Spokane
-
Indoor Photography Studios Spokane – Kelly Tareski Photography
-
How to choose the right photographer
-
Benefits of Accreditation for Photographers
-
Why Hiring An Accredited Photographer Matters
-
My Journey to Accreditation – The Portrait Masters
-
Elevating Spokane Modeling Photography
-
Ultimate Survival Guide for a Family Photo Shoot
-
Top Ten Questions to Ask a Professional Photographer
-
Your Guide To Choosing A Professional Photographer
-
A Journey through 10 Diverse Photography Genres
-
Hair and Makeup for Portrait Photography Spokane – Kelly Tareski Photography
-
A Comprehensive Guide to Capturing Stunning Portraits
-
The Four Seasons of Portrait Photography
-
The Difference Between Graduation Photos and Senior Pictures
-
Black and White VS Color Photography
-
The History Of Spokane Photographers
-
Top Ten Life Events That Call for a Professional Photographer
-
The Evolution of Photography
-
A Labor of Love-Building The Warehouse Door Garden Gate
-
Five Tips for Nailing Your Boudoir Photography Shoot
-
Lifestyle Photography Sessions Explained
-
The Ultimate Guide to Capturing the Perfect Family Portrait
-
Step into the Dramatic Grey Studio
More Education Posts
-
Whimsical White Studio – How I Create Amazing Photos
-
My Magical Retro-Themed Cabin Studio
-
Get Creative! Five Unique Ways to Personalize Your Family Photos
-
Five Birthday Milestones That Call For Professional Photography
-
Five Tips for Gorgeous Outdoor Photos
-
Tips to Look Your Best in Professional Photos
-
The Importance of a Photography Consultation
-
Five Reasons You Need Professional Prints For Your Photos
-
A Photography Reveal Session Explained
-
5 Hair and Makeup Tips for the Perfect Photography Session
-
6 Senior Photo Shoot Mistakes to Avoid in 2023
-
The Importance of Editing for Professional Photography
-
A Glimpse Into The Past at Kelly Tareski Photography - 2019
-
Being a Photographer in Washington State - Spokane
-
Why Quality Equipment is Essential in Photography
-
Natural Light and Studio Lighting for Photography
-
Enhancing Photography With Natural Light
-
Five Tips for Using Studio Lighting in Photography
-
Understanding the Cost of Professional Photography
-
Amazing Metal Prints for Your Home
-
Canvas Prints - Affordable and Beautiful
-
Bring Vintage Into Your Life With The Retro Viewer
-
Photographers In North Spokane Washington
-
Photographer Near Me - Spokane Washington
-
Photographers Near the Spokane Valley
-
Professional Photographers Near Cheney Washington
-
Professional Photographers Near Medical Lake Washington
-
Professional Photographers Near Reardan Washington
-
Professional Photographers Near Davenport Washington
-
Professional Photographers Near Deer Park Washington
-
Professional Photographers Near Liberty Lake Washington
-
Professional Photographers Near Airway Heights Washington
-
Professional Photographers Near Millwood Washington
-
Professional Photographers Near Chewelah Washington
-
Professional Photographers Near Colville Washington
-
Professional Photographers Near Newport Washington
-
Professional Photographers Near Kettle Falls Washington
-
Professional Photographers Near Mead Washington
-
Professional Photographers Near Springdale Washington
-
Professional Photographers Near Spangle Washington
-
Professional Photographers Near Valleyford Washington
-
Professional Photographers Near Rockford Washington
-
Professional Photographers Near Fairfield Washington
-
Professional Photographers Near Rosalia Washington
-
Professional Photographers Near Colfax Washington
-
Professional Photographers Near Loon Lake Washington
-
Professional Photographers Near Harrington Washington
-
Professional Photographers Near Tekoa Washington
-
Professional Photographers Near Chattaroy Washington
-
Professional Photographers Near Colbert Washington
-
Professional Photographers Near Northport Washington
-
Professional Photographers Near Metaline Falls Washington
-
Professional Photographers Near Post Falls Idaho
-
Professional Photographers Near Coeur d'Alene Idaho
-
Professional Photographers Near Rathdrum Idaho
-
Professional Photographers Near Blanchard Idaho
-
Mastering the Art of Sexy Professional Photography
-
10 Tips for Shooting Better Portrait Photography
-
5 Tips Using the Nikon Z7ii Camera for Portrait Photography
-
Seven Tips For Natural Light Photography
-
Mastering Natural Light: Techniques for Stunning Outdoor Portraits
-
How to Prepare for Your First Professional Photoshoot
-
Capturing Emotion: The Art of Candid Photography
-
The Ultimate Guide to Choosing the Perfect Photography Studio
-
Top 10 Photography Tips for Beginners
-
How to Pose Like a Pro: Tips for Flattering Portraits
-
Understanding Camera Settings: A Beginner's Guide to Manual Mode
-
The Role of Props in Photography: Enhancing Your Images
-
10 Creative Ideas for Unique Family Portraits
-
How to Price Senior Portrait Sessions
-
The Benefits of Hiring a Professional Photographer for Your Event
-
Why Is Professional Branding Crucial for Success?
-
Exploring Different Photography Styles: Which One Suits You?
-
The Magic of Golden Hour: Why Timing Matters in Photography
-
How to Create a Photography Portfolio That Stands Out
-
The Evolution of Photography: From Film to Digital
-
Understanding Composition: The Rule of Thirds and Beyond
-
The Impact of Backgrounds: Choosing the Right Photo Setting
-
How to Choose the Right Outfits for Your Photoshoot
-
Mastering Elegant Boudoir Photography Techniques
-
How to Capture Stunning Landscape Photos: Tips and Techniques
-
The Power of Black and White Photography: When Less is More
-
The Art of Storytelling Through Photography
-
How to Photograph Children: Capturing Genuine Smiles and Moments
-
Human Branding: Connecting Professionally
-
Advancing Your Skills: Professional Photography Education
-
Elegant Boudoir: Empowering Through Photography
-
How to Create Timeless Photos and Portraits
-
Art Photography Printing: Bringing Images to Life
-
Capturing Timeless Portraits Tips and Techniques
-
Post-Production Photography: Enhancing Your Images
-
The Importance of Lighting in Photography: Natural vs. Artificial
-
The Role of Makeup in Photography: Preparing for Your Close-Up
-
The Importance of Printing Your Photos: From Digital to Tangible
-
High School Senior Photos: Your Comprehensive Guide
-
What to Wear: Men's Engagement Photo Outfits
-
How to Master Creative Black and White Portrait Photography
-
Capturing Memories: Senior Photos with Guitar
-
Breaking the Rules: Creative Photography Techniques to Try
-
Enhancing Your Home Dacor with Custom Photography Prints
-
Creative Couples Photography: Capturing Connection and Chemistry
-
Stunning Nighttime Portraits: Capturing the Beauty of the Dark
-
Exploring Minimalism in Photography: Less is More
-
Embracing Imperfections: Capturing Real Moments in Photography
-
Prepping for a Fitness Photoshoot: How to Look Your Best
-
Turning Your Photography Hobby into a Business
-
Capturing the Connection: Tips for Couple's Lifestyle Photography

